- 4min
- 9292
- 0
Contents
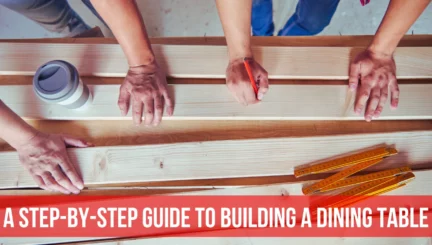
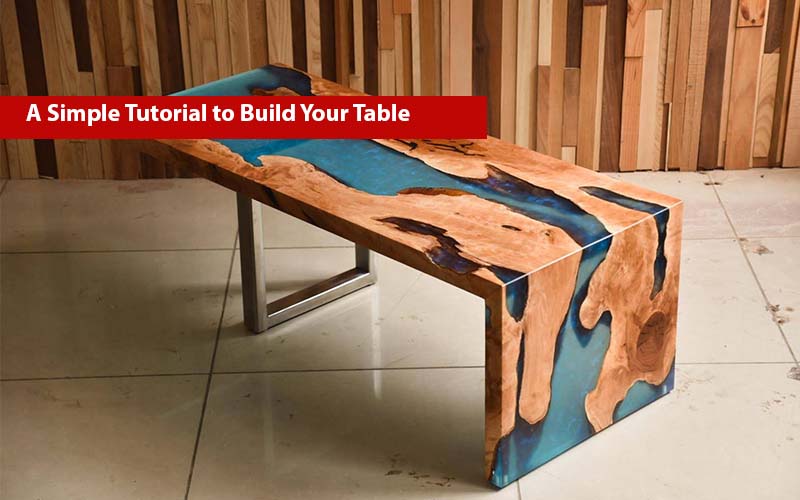
Are you interested in making a DIY epoxy table? The instruction given here is about a creative epoxy resin table with a river and waterfall in the middle, one that’s different from all. This project is not as hard as you think with the tools introduced below.
Click to see this article: How to Make a Wooden Table- Step by Step Guide

Tools Needed
- A Miter Saw
- A Circular Saw
- A Table saw
- A Grinder
- A Welder
Materials Needed
- Hardwood Live Edge Slab
- Square Tube Steel
- Epoxy Resin
- Sealant Tape
- Metallic Pigments
How to Make a DIY Epoxy Resin River Table in 7 Brief Steps
- Prepare the Live Edge Slabs
- Build up an Epoxy Resin Form
- Pour Epoxy Resin in the Built Form
- Build a Metal Table Base
- Clean the Epoxy Resin Slab
- Cut and Join the Waterfall Edge
- Assemble and Finish
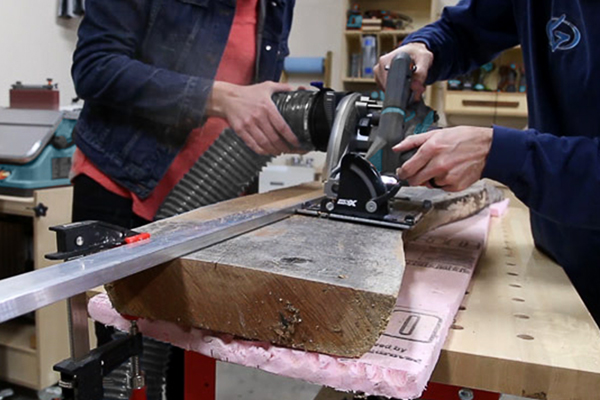
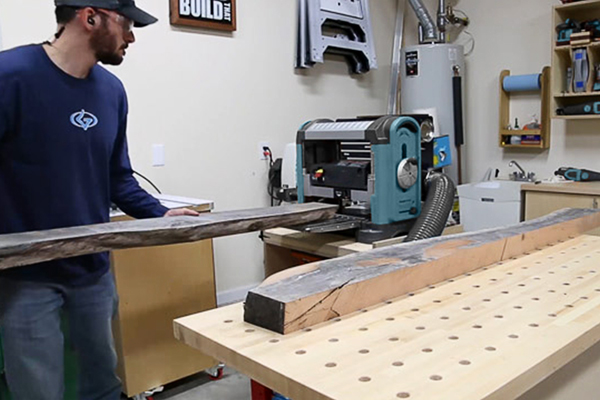
Prepare the Live Edge Slabs
- Buy a good quality monolithic wood slab perfect for making a DIY river table.
- Use a string and place it on the center of each end of the slab to find the best cut line.

- Then mark each slab ends for the cut.
- With the help of your circular saw, cut the slab in multiple passes; then, use your jointer to flatten the surfaces of the slabs.
- Machine the slabs down to get slabs with the right thickness, then cut them to the suitable size on your miter saw.
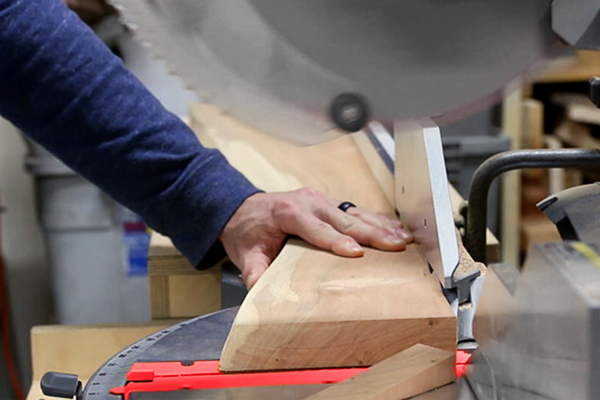
- Clean up the live edges to prepare it for pouring epoxy resin.
- Sand any loose material to make a good surface for the sticking epoxy.
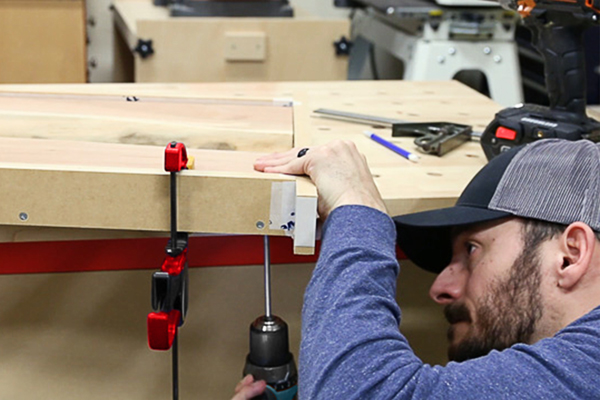
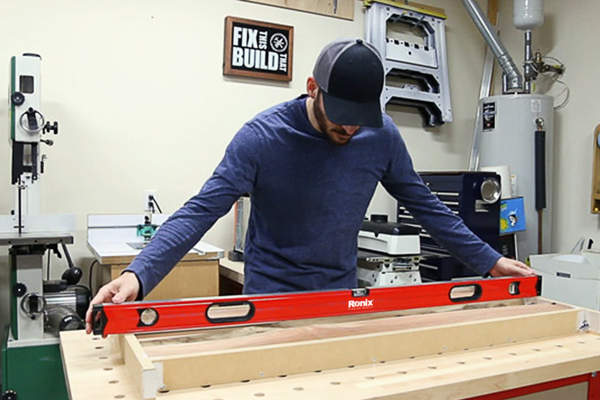
Build up an Epoxy Resin Form
- Make a form for the pouring epoxy.
- Cover the pieces in sealant tape to prevent epoxy resin from sticking.
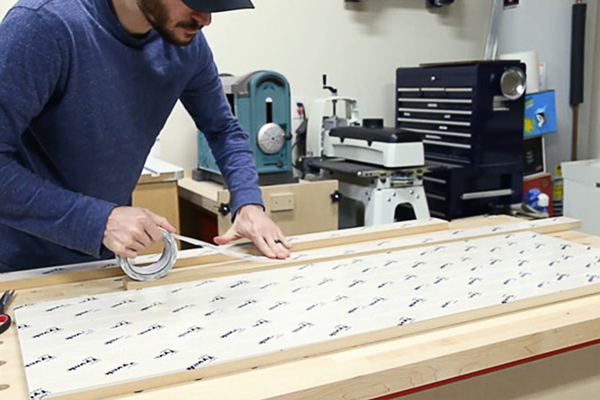
- Use screws and put the epoxy resin form together; seal the form’s inside corners using more sealant tape.
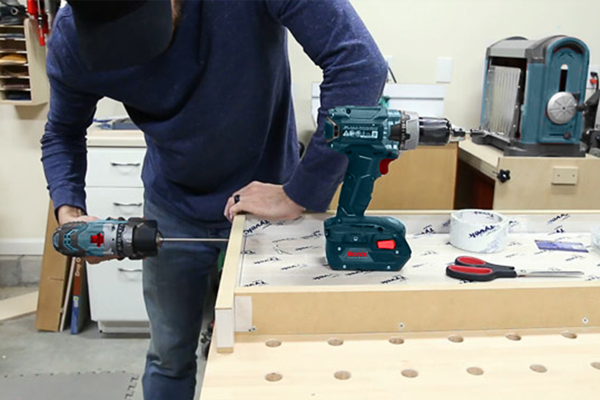
- Load the live edge slabs into the form.
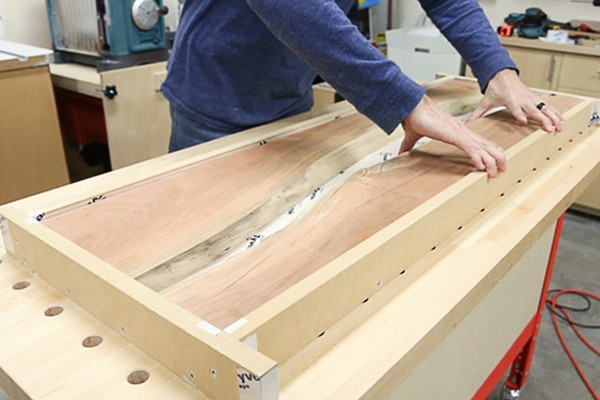
- Clamp the wood down to keep slabs from floating on the epoxy resin, screw the wood to the form.
- Level the form for pouring the epoxy.
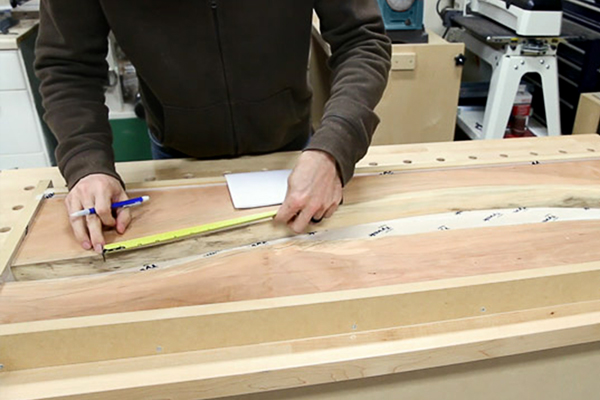
Pour Epoxy Resin in the Built Form
- Measure the gap between slabs and figure out how much epoxy resin you need, here we pour 1-3/4″ epoxy at a time.
- We want a two-color epoxy pour, so we mix epoxy containers, add metallic pigments, and mix them for some minutes.
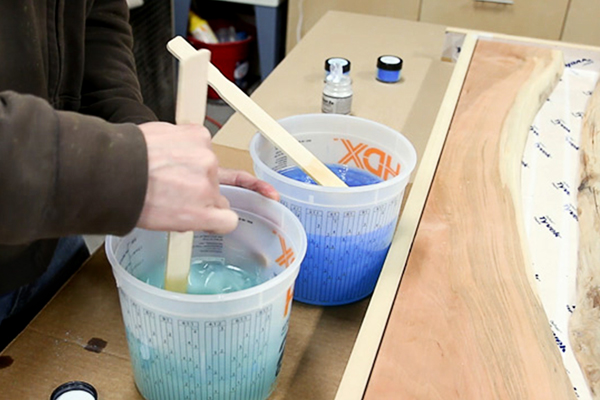
- Start pouring two epoxy resin bottles from the two ends and let them mix.

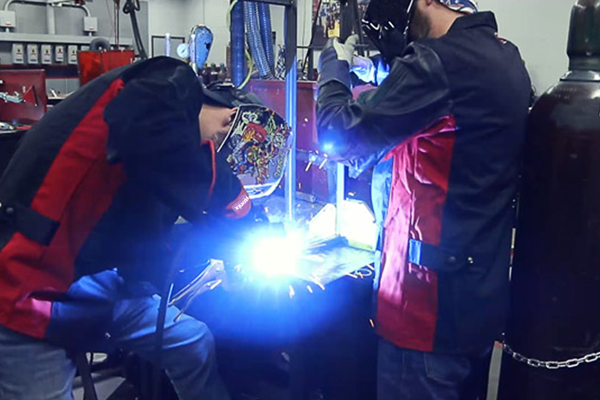
Build a Metal Table Base
- Buy some 1” square tube for the table base.
- Use your welder to weld the base together.
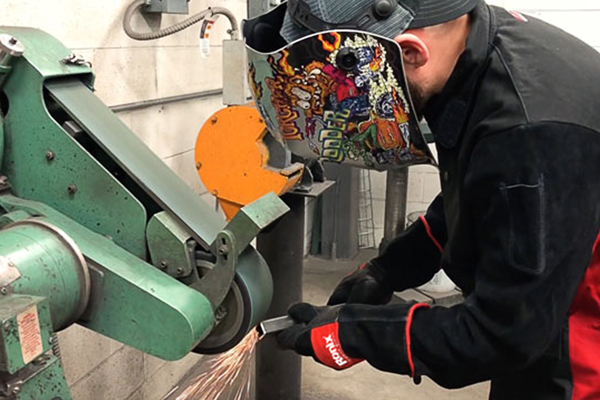
- Use your cordless grinder and a flap disc to ground down the welds on the base.
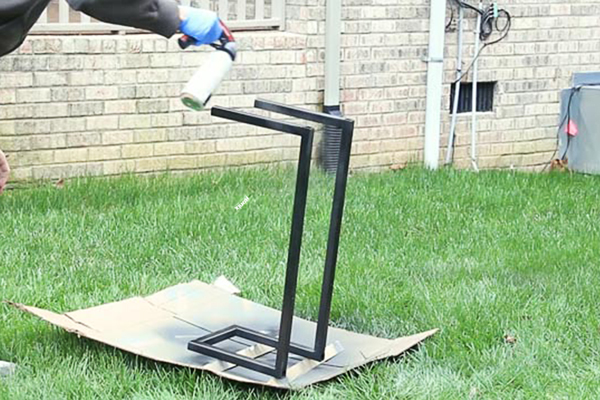
- Drill mounting holes in the base for the top, then spray some matte black paint and matte clear coat on it.
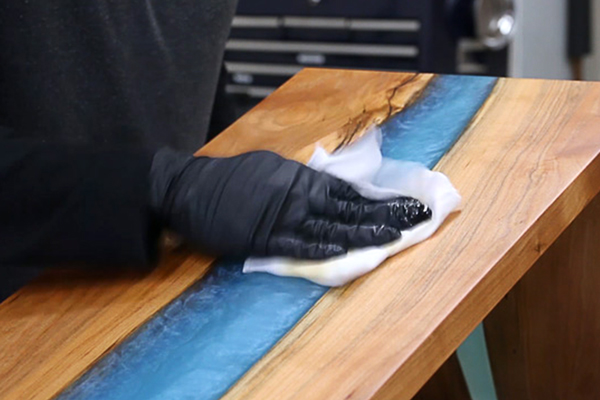
Clean the Epoxy Resin Slab
- After completing the 72 hours cure time, it gets hard.
- Unscrew and remove the sides from the form and remove all screws from the slab bottom.

- Use your planer to remove any excess from the bottom.
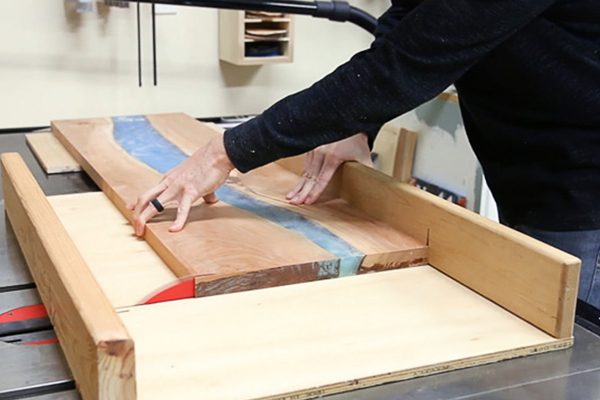
- Clean up the sides and square up to one edge on the jointer, then trim the other side on your table saw.
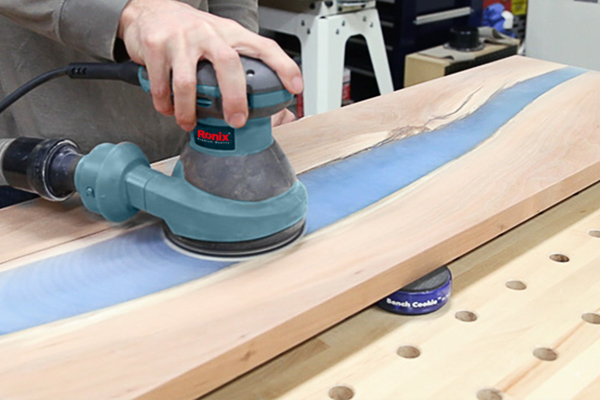
- Go ahead and sand the slab up to 180 grit and take the epoxy up to 400 grit.
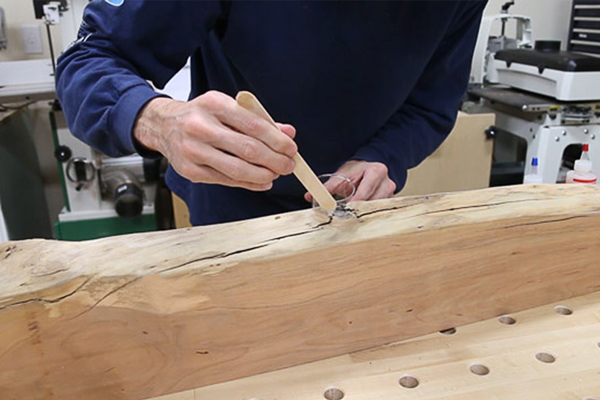
Cut and Join the Waterfall Edge
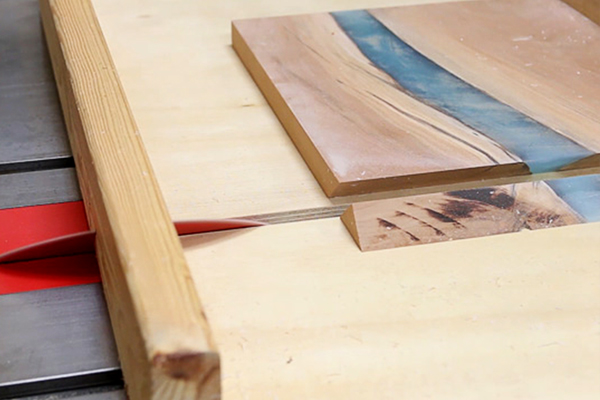
- To cut the waterfall edge, use your table saw and crosscut sled. Tilt the blade to 45 degrees and make the initial bevel on the larger vertical piece.
- Flip the smaller top piece over and back and bevel it with a matching miter. Move the blade 90 degrees and precisely cut the larger piece for the base.

- With the miters facing down, line up the pieces and put a piece of packing tape across the seam.
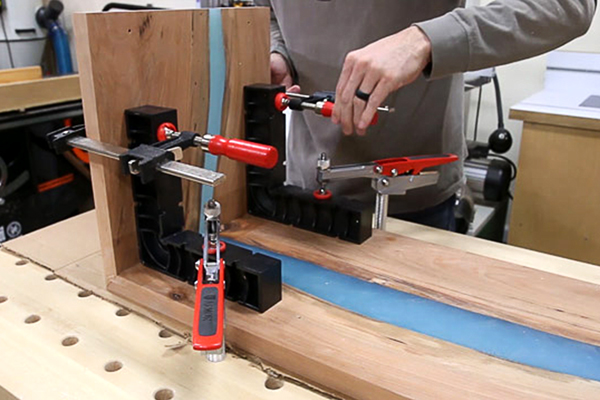
- Fold up the miter and use the top to position and clamp down a pair of angle squares to the slab.
- Use 5-minute epoxy again, apply it to one side of the joint, fold up the miter, and clamp the top to the angle squares.
Assemble and Finish
- Let the epoxy set up over 24hours and take it out of the clamps.
- Do some final sanding before finishing.
- Apply a two-part oil-based finish to the slab to help the epoxy come to life.
- Mount the base upside down and shim the wood.
- Your Epoxy Resin River Table is ready!
Credit to the tutorial and photos goes to fixthisbuildthat

Ronix
16 March 2021